Archives

South African Rusks

01Jan

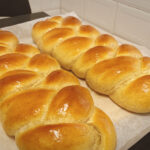
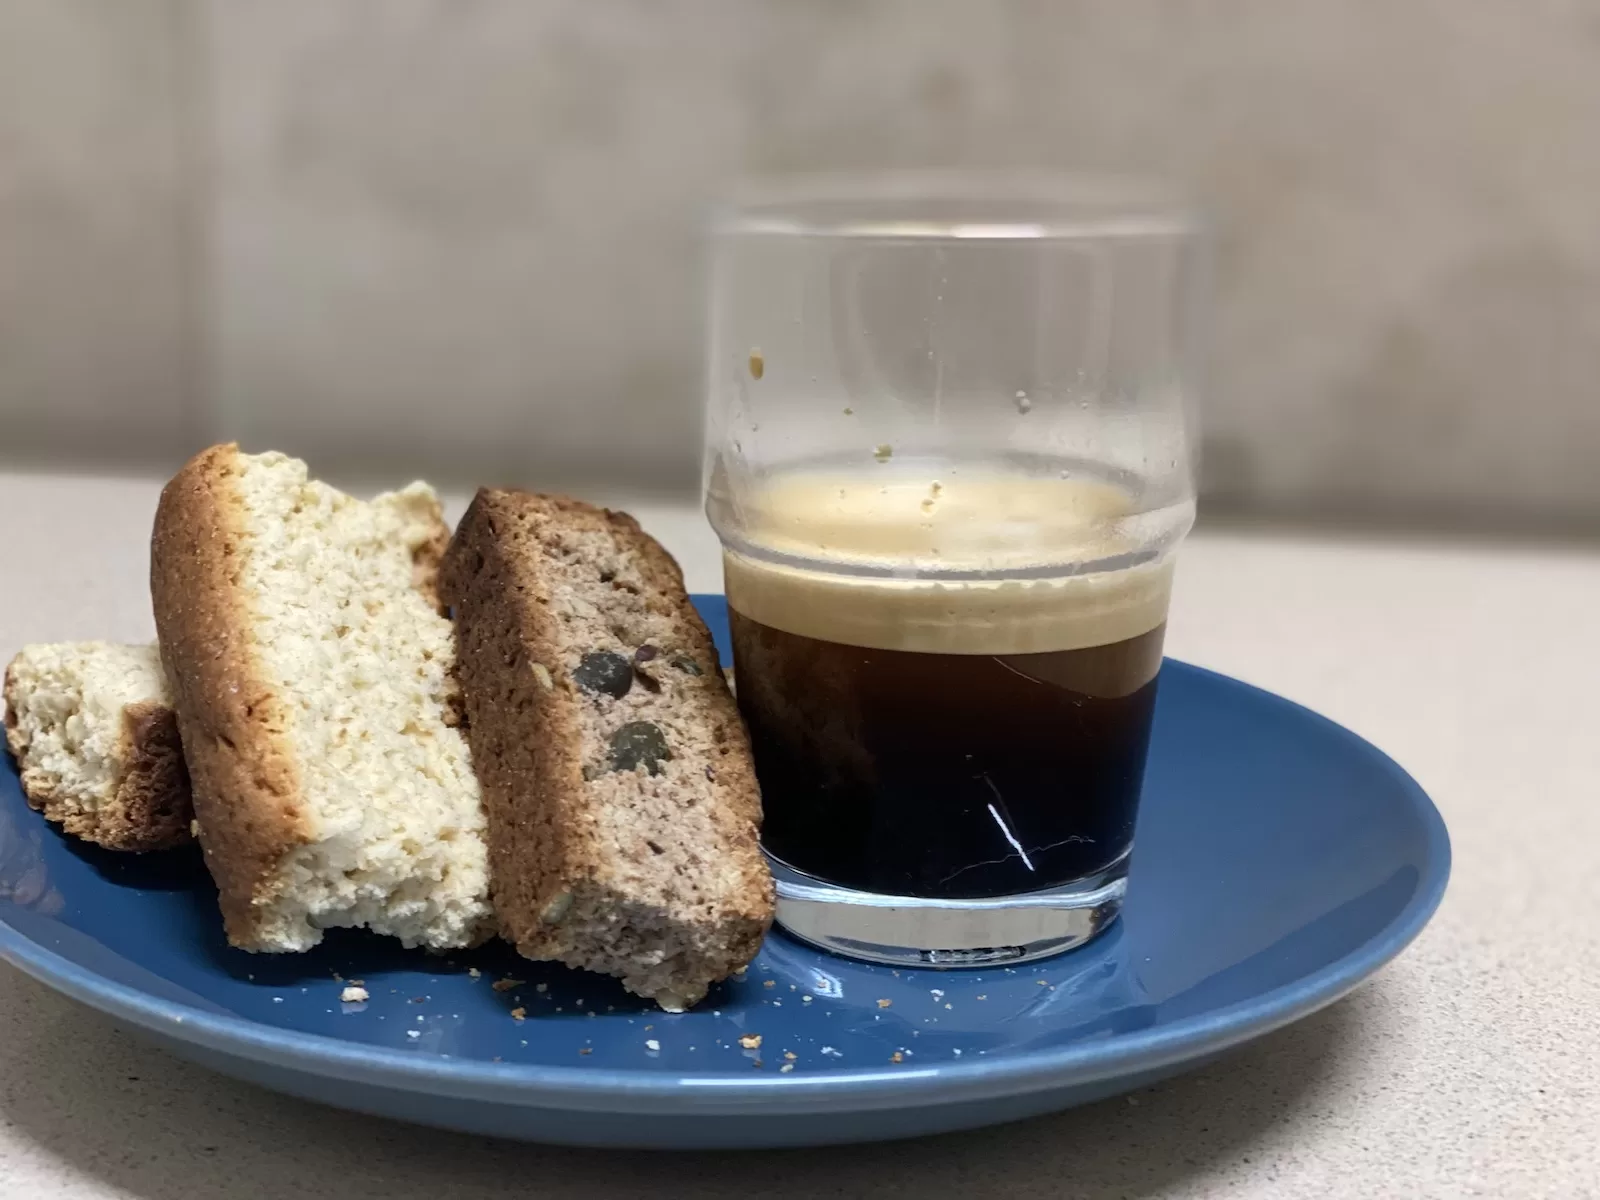
One of the most popular treats for our guests is the South African rusks or Beskuit.  It doesn’t matter from which country they are everyone enjoys it.  As a child I can remember seeing my mom knead the rusk dough by hand and rolling it into balls and it always looked like a lot of hard work.  So it took me a while to be willing to try it here in Israel.  Once I mastered up the courage it was a matter of finding the right recipe.  

We found a recipe online that looked promising but when we started making it we realised that the buttermilk in Israel is very different to the buttermilk that you can find in South Africa.  So since starting to make the rusks we have had to make many adjustments to ensure that our dough is the right consistency.  Since then we have also started adding nuts and coconut to our recipe and replacing the white flour with brown flour in order to make a healthier version of the rusk – well I am not so sure as to how healthy it could be because we still add a lot of sugar.

What you need for the white rusks

  • 850 grams of white flour
  • 2 eggs
  • 200 grams of butter (please not margarine) Jacques says that margarine is like plastic.

Make sure that your butter is soft but not melted.  We tend to stock up on butter when it’s on sale and keep it in the freezer but this means when we want to make the rusks, we have to take it out beforehand.  Sometimes I forget to take out the butter in time and then Jacques will grate the butter with a grater into the flour for me.  I refuse to do this because I hate getting my hands full of butter and he is so much stronger than me so for him it is easy to grate the hard butter.

  • 30 grams of baking powder
  • 250 grams of sugar
  • A little bit of salt
  • Buttermilk

You will notice that I do not give a measurement for the buttermilk, as I do not measure the buttermilk. It normally 300-400ml.  I keep my mixer going on a low speed and slowly add the buttermilk until the dough pulls together so that the dough mixer can start to knead the dough.

What you need for the brown rusks

  • 700 grams of flour (about 200-250g white and 450-500g brown)
  • Coconut, crushed nuts and seeds of your own choice about 200 grams 

If I am being honest I do not really measure the amount of nuts seeds and coconut that I add to the flour, if add until I feel that there is enough to give good taste and texture to the rusk

  • 200 grams of butter (please not margarine) Jacques says that margarine is like plastic.

Make sure that your butter is soft but not melted.  We keep our butter in the freezer so when we want to make the rusks we have to take it out beforehand.  Sometimes I forget to take out the butter in time and then Jacques will grate the butter with a grater into the flour for me.  I refuse to do this because I hate getting my hands full of butter and he is so much stronger then me so for him it is easy to grate the hard butter.

  • 30 grams of baking powder
  • 300 grams of sugar
  • A little bit of salt
  • Buttermilk

You will notice that I do not give a measurement for the buttermilk, as I do not measure the buttermilk. It normally 300-400ml.  I keep my mixer going on a low speed and slowly add the buttermilk until the dough pulls together so that the dough mixer can start to knead the dough.

Of course first put on your oven to 180 degrees Celsius.

Place your flour (and nut and seed mix if you are making the brown rusk version) into the mixing bowl

Add the sugar and baking powder and salt.  Just to make sure that all the dry ingredients are combined. We use a mixer with a dough hook attached and we switch the mixer on for a second or two. You can do this by hand as well.

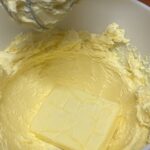
Add the soft butter to the dry ingredients and start the mixer so that it incorporates the butter with the dry ingredients. If you are mixing and kneading by hand, it’s a good idea to rub the butter and flour together with your fingertips.

Add the eggs and start the mixer again.  Once the eggs are mixed in we reduce the speed to 1 and slowly add the buttermilk until the dough is wet and starts to pull together.  I do not like a very wet dough because it is difficult to work with and sticks to everything so I pour my buttermilk in bit by bit to avoid adding too much.

Once everything is in and you can see that the dough is being kneaded by the mixer you can put it back on to a higher speed to knead for about 5 to 7 minutes.

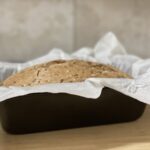
Once it is done I give the dough to Jacques who has already greased the rusk pans that we use. We have special rusk pans that has its own cutter. 

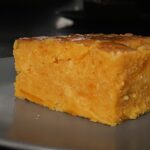
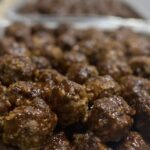
He then flattens it out and uses a wine bottle (our rolling pin) to smooth out the dough into an even height throughout the pans. The last thing then is to cut the raw dough with the special blade and then into the oven they go for about 1 hour. We rotate our pans every 15-20 minutes to avoid dark spots. If you don’t have this kind of rust pans you can shape the dough into little balls a bit smaller than a golfball and place them in neat straight rows tightly together in a loaf tin. Each ball will end up being one rusk.

When they are finished baking we remove the pans from the oven and let it cool down.  Once it has cooled we flip the pans over to allow the “fresh rusts” to drop out of the pan.  I keep my hand on the top to prevent it from falling out too fast and breaking.  Normally the fresh rusts should release easily. Then we break the rusks into smaller pieces by following the cut lines that we made with the blade.  If you made little balls, you can break it on the seams. This is also a great time to enjoy a piece of freshly baked rusks before drying them out. We normally call the kids to come grab a few. Jacques likes to spread a nice thick layer of butter on it.  In my family I have to work very fast with this process otherwise my kids and Jacques will finish everything even before the drying out process.

If you didn’t devour all the pieces, you can pack it onto an oven grid and then place it back into the oven on a very low temperature about 80-100 degrees Celsius. As tradition goes you put a wooden spoon into the door of the oven so that it is slightly ajar.  To allow it to completely dry out, the drying out process can take 3-6 hours.  Be careful that your oven is not too high so that the rusks will not burn.

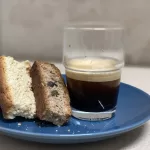
Once they are completely dry and hard allow it to cool and place in a air tight container for all to enjoy with a cup of coffee or tea.

Ice Cream

01Jan

This is by far the easiest most successful recipe that we have discovered and have played with, to make exciting variations that can suit any accompanying desert or even stand on its own as a desert.

What you need

  • 500ml of 38% cream – whipped
  • 1 can/jar of sweetened condensed milk

This is just the most basic ingredients to make single batch, but double is always better than single.

Whip the cream until it is stiff and forms peaks.

Add 1 can of condensed milk and mix it together. 

Put it into a covered container in the freezer until frozen (normally at least 8 hours) and there you have it your own homemade basic ice cream.

Everybody will think it is store bought.

But then of course knowing us you have to change it up a bit to experiment with it.

Normally we make it double.

So we do 1 liter of cream
2 cans of condensed milk

To this we add some flavour depending on what we feel like enjoying. Here are a few ideas

  • Vanilla essence for a fresh vanilla flavour.
  • Sprinkles or otherwise known as hundreds and thousands – this gives the ice cream a nice colourful look, the kids love this.
  • Crushed cookies.
  • Chocolate chips – not to much as it can be a bit overwhelming if the chocolate chips are too big (you can always finally chop up a chocolate bar or two).
  • Fine instant coffee powder (the coffee powder we first dissolve with some of the condensed milk before adding it to the cream) – this you have to measure by taste – depending on how strong you want the coffee flavour to be.
  • Peppermint flavour drops – again according to your own taste (you can also add a bit of green food color and chocolate chips).
  • Cocoa powder for a chocolate flavour.

The list is endless – you can really experiment until you have found the flavour that suits your need.

If we make one of the following variations, we substitute one can of condensed milk with one of the ingredients below.  We make sure that our replacement is more or less the same volume as the can condensed milk.

  • 1 can of Caramel (Dulce da Lech)
  • 1 jar of blueberry or cherry pie filling
  • 1 jar of jam

The most elaborate flavor we have made was Strawberry Cheesecake.

After mixing 1 liter of whipped cream and a can condensed milk. We added a container of cream cheese at least 25% fat – which we whipped beforehand. We added a jar of strawberry jam. We crushed some graham crackers and then also mixed it all together.

Like I said the sky is the limit so enjoy playing and experimenting.

It is worth noting that any fresh fruit you add will be icy. We have tried it and its not the most desirable outcome.

Baked Cheesecake

01Jan

Jacques and myself received an Israeli recipe book a few years ago and in it was a very easy baked cheesecake recipe.  We have since adjusted the ingredients a bit according to our own experience.

What you need for the crust

  • Lotus biscuits – finely crushed
  • Two egg yokes

What you need for the cake

  • 750 gram of Soft White Cheese (like a cream cheese)
  • 3 eggs and 2 egg whites – we take the yellow of these egg whites and use if in the crust of the cake
  • 200 gram sugar
  • 1tsp vanilla essence

That you need for the topping

  • 3 x 200gr sour cream
  • 40gr vanilla sugar

We bake our cheesecake in a rectangular foil pan and find that this amount of sour cream is enough to cover the entire cake.  If you are using a different shape of baking dish you might need less.

Pre heat your oven to 180 degrees Celsius.

Crush the biscuits finely We normally use our food processor. The recipe calls for egg whites. We normally saved the yolks for later use but most time they ended up being discarded. One day we thought why not use the yolks instead of butter to bind the biscuits seeing as it gets baked. It worked wonderfully, so once the biscuits are crushed mix in the egg yolks.  Spread it at the bottom of your baking dish and press it down firmly using the back of a spoon (or your fingers).

In a mixer put your white cheese and sugar and mix it well until the white cheese is nice and smooth.   Add your egg and egg whites and mix it again thoroughly.

Add the vanilla essence.

Pour you’re filling on top of your biscuit base.  To achieve a nice even bake on a cheesecake you have to bake it in a water bath.

To avoid spills and burns we normally place our baking dish into an oven pan, put it in the oven and then add hot water into the oven pan. 

Bake for about 50 minutes.

Recently Jacques watched a YouTube video about baking cheesecakes the video suggested that when baking a cheese cake you should be careful not to over bake it.  There should still be a slight juggle in the middle of the cake.  This allows the cheesecake to have a creamy texture.

While baking mix the sour cream and vanilla sugar together.

Once the cheesecake is baked, remove it from the oven and spread the sour cream mixture evenly on the top.

Bake for another 10 minutes

Allow it too cool and store it in the fridge.

Miriam, our daughter, asked us one Shabbat when she was eating her portion how we thought some date syrup would taste on the cheesecake.  We told her to try it and she loved it.  So now when we serve the cheesecake we also bring the date syrup to the table for the guests to also try it.

We have also played with a few additions as an additional topping, here are some suggestions

– A very soft chocolate ganache

This you achieve by warming cream in a pan, (according to the amount you want to use on top of the cheese cake)  remove it from the heat and add chocolate chips to the warm cream.  The amount of chocolate that you use determines how hard or soft the ganache will be.  If the chocolate chips do not melt completely, you can place the pot on the heat again for a few minutes.

I have used a ganache to cover the entire cake as a third layer and also just to use as a decoration on the top.

– We have also used blueberry pie filling as a decoration on the top.