Archives

Tomato and Cucumber Salad

01Jan

Since my very first Shabbat Meal with Family Nel in Beit Chai so many years ago this particular salad was always on the table.

This was my father-in-law’s favourite salad.  Once the meal was finished he would always take what was left over and finish it. 

What you need for the salad

  • Cucumbers
  • Tomatoes (I prefer to use cherry tomatoes as it is less soggy and you only need to cut it in half)
  • Onions

What you need for the dressing

  • Vinegar 
  • Sugar 
  • Salt and Pepper

Cut the tomatoes in half (if using cherry tomatoes, otherwise cut it in small cubes)

Cut the cucumbers in small pieces

Cut the onions in small pieces or slices 

The shape of your vegetables are absolutely your own choice.  

Mix the vinegar, sugar, salt and pepper together and let it stand for a while to allow the sugar to dissolve.

For Gerrit the more sugar we used, the better.  This again is obviously according to your own taste and preference. 

We mix the vinigar, sugar, salt and pepper together a few hours before we need to serve the salad to allow the sugar to disolve into the vinegar.

Make sure you have enough salt and pepper over the salad.

We add the dressing over the salad just before we have to serve it to prevent it from becoming soggy and “pickled”.

Cumin Carrot Salad

01Jan

This is a very common Moroccan style salad found in Israel. Different restaurants and hotels have their own way of preparing it. We started making it purely according to taste and what we thought the ingredients should be. It’s one of Jacques’ favourites.

What you need for the salad

Carrots
Cilantro leaves

What you need for the dressing

I will not give any exact amounts because I cannot – I never use any measuring system when making a dressing.

Cumin Spice
Salt
Olive Oil
Lemon Juice

Peel the carrots and cut them in circles.

The thickness of the circle is really up to your own preference.

Place them into a pot with water. We already add salt and cumin into the water that we boil the carrots in as we find that it enhances the taste of the carrots.

Boil the carrots until soft, but not too soft it. Is nice if they still have a slight crunch on them so that it is not a soft soggy salad.

Drain the water and allow the carrots to cool down.

Mix together the olive oil, lemon juice, salt and cumin until well combined – Jacques likes a very strong cumin taste on this salad so we are very generous when using the cumin, but it is really up to you how you spice this dressing.

Finely chop the cilantro and add it to the carrots.

Cover the salad with the dressing and make sure that everything is well covered.

We normally prepare this salad a day ahead of time to allow the flavours to mix and rest well.

We also take it out of the refrigerator about an hour or so before serving to allow the olive oil to liquify, olive oil solidifies when it is chilled.

Mix the salad through before serving to ensure that all the flavours are mixed well.

Sweet and Sour Eggplant Salad

01Jan

When I started helping in the kitchen of Beit Chai, we had certain set salads every week for erev shabbat. As the responsibility of Jacques and myself grew, we started experimenting with new and different salads. One of the salads we had made weekly was a tomato based eggplant salad which we now only very seldomly make. Most of the time if we make it, we make it as for a filling for vegetarian lasagna. As a replacement, we started making this sweet and sour eggplant salad. It is an absolute favourite Shabbat salad among our guests.

What you need 

  • Eggplant, aubergine, brinjal
  • Onions
  • Red peppers
  • Vinegar
  • Sugar
  • Salt and pepper
  • Sesame seed for garnish

We start by dicing the onions and peppers into small pieces and then fry them together in olive oil. I prefer to use our non-stick pot (yes frown if you must) as the eggplant needs a lot of time on the stove to become nice and soft. I have found with any other pot it tends to burn to the bottom of the pot. If there is anything besides a messy kitchen I really dislike, its a burnt pot.  So if you do not mind scrubbing a pot please feel free to use a normal stainless steel pot.

While I am frying the onions and peppers, Jacques normally cuts the eggplant into small 1.5cm squares.  Once the onions and peppers are lightly caramelized or sautéed, we add the eggplant.  Usually at this point Jacques also dumps a half a bottle of olive oil on the eggplant. Okay I’m exaggerating a bit but some extra olive you is welcome. The pot might seem very full but bear in mind the eggplant loses a lot of volume while cooking. Stirring regularly we cook it together until the eggplant starts changing from its dry spongelike appearance to a moist appearance.

Then we add the vinegar, sugar, salt and pepper and allow the eggplant to cook for at least 30 minutes with the lid of the pot on.  You will need to stir it occasionally to prevent it from burning. It a good idea to taste it and add more vinegar if you feel it’s not acidic enough or more sugar if you need to sweeten it a bit. You might need to add a bit of both if you see it drying out a bit as it cooks.

The salad is ready once the eggplant is completely soft and has totally lost its sponge-like texture. Allow it to cool and store in the fridge. We normally make if the day before. When serving it you can sprinkle some sesame seed on top.

Cucumber and Feta Salad

01Jan

This salad was born out of Gerrit’s favourite salad, which was Tomato and cucumber salad. 

We used to serve the tomato and cucumber salad every week with Shabbat and whatever was left over he would finish. The only thing is that Jacques does not eat tomatoes so I searched for a salad that I could make just for him. 

Although it is a very fast and easy salad it is very flavourful.

What you need for the salad

  • Cucumber 
  • Onions
  • Feta

Optional addition of Fresh parsley 

What you need for the dressing

  • Olive oil
  • Lemon Juice 
  • Salt and pepper 

Cut the cucumbers according to your own desire. We sometimes chop them up into squares and sometimes just in round slices or half rounds. 

We prefer to use red onions for the colour that it adds to the salad.  It’s also a bit sweeter. These to you can cut in small squares or thin slices. 

Cut the Feta in small cubes.

Mix all the ingredients of the dressing together and taste it before pouring it over your salad.  Make sure you use enough salt and pepper otherwise the salad can be a bit bland.

For a special treat we have also recently added fresh cut parsley, just because we had it in the fridge.  It was such a great addition that I think it will now be a permanent part of the salad, unless we don’t have it in the fridge.

We normally only add the dressing to the salad just before we serve it. 

Broccoli Salad

01Jan

Finally, at last the famous broccoli salad. This salad is a great addition to either a Shabbat meal or a “braai”.  It’s just a few simple ingredients and is so basic and easy to make but it’s always a huge hit.

What you need 

  • 1 or 2 heads of Broccoli
  • Sunflower seeds
  • Red or white onion

What you need for the dressing 

  • Mayonnaise
  • Brown sugar
  • Balsamic vinegar

Cut the broccoli down into bite sized pieces.  Dice your onion into small pieces.  We prefer red onions.  It adds a bit of colour and tastes a bit sweeter.

Mix the broccoli and onions together.

Mix the ingredients for the dressing together to taste.  Allow the sugar to dissolve into the mayonnaise and vinegar before dressing the salad.

We normally taste the dressing as we go along to make sure that it is sweet and acidic enough and of course that there is enough to cover all of the broccoli.

In a frying pan toast your sunflower seeds.  Make sure that you keep a close eye on the sunflower seeds as not to burn them.  They are very sneaky, one moment they are still happily toasting away and the next moment they are burned.  Please note that sometimes they continue to roast even after you have taken it off the heat.  So then it is best to immediately transfer them into a bowl to cool down instead of keeping them in the pan where they might burn.  You can skip this step but when you toast the seeds it enhances the flavour.

Once the sugar in the dressing has dissolved you can mix it together with the broccoli and onions.

The sunflower seeds we add to the salad just before we want to serve it, this way they still have their crunchy texture.

We have also added cranberries to this salad on occasion to mix things up a bit.

Grilled Eggplant

01Jan

I have heard so many times that people say, “I do not like eggplant”.

So I love to prepare for them one of our many good eggplant dishes to try and win them over – I am not even sure why because I also do not like eggplant.  Most of the time the dish wins and eggplant gains another fan.

What you need 

  • Eggplant (obviously)
  • Tahina (I am not sure if you even get it in other countries – but if you come to visit us you can buy yourself a bottle of it and make the dish when you return home.)
  • Date syrup (again not sure if you get this outside of Israel but you could probably replace this with golden syrup or honey) let me know if you find it so that I can update this comment

For the toppings on top of the eggplant after you apply the tahina and date syrup

  • Pomegranates, dried cranberries or even fresh tomato cut into small cubes (I don’t use the tomato because then Jacques doesn’t enjoy the dish)
  • Optional some chopped chives for garnish.  We fully believe that you eat with your eyes so we are always trying to present our dishes in the most attractive ways as possible.

First we cut the eggplant in half – wait wait wait before you cut – it has to be length wise from top to bottom

Then you make cuts into the eggplant – wow how will I explain this to you now.

Wait a bit I will ask Jacques to write the next line.

Without slicing through the skin make diagonal cuts about 1-1,5cm apart in one direction rotate the eggplant 180 degrees and make more diagonal cuts in the other direction. This will form small squares on the eggplant. I like to use a knife with a rounded end that I don’t accidentally cut through the skin.

Then we brush the eggplant with olive oil and season it with whatever spice I feel like putting on – so use your imagination.

Then we place them skin side down into the oven uncovered and let them roast. When the eggplant has lost its sponge like texture and the little squares starts to crisp up then you know it is done.

Normally we serve this one cold so it is ok to do it a few hours before the meal starts.

Then just before we serve it (and by this I mean really just before otherwise the Tahina and date syrup runs down) we take the Tahina in a squeeze bottle and squeeze a few random lines all over the eggplant and also over the plate to make it pretty. Next do the same with the date syrup and add the topping of your choice.

By the way if you use fresh tomatoes maybe salt it a bit before you add it as a topping.

Grilled Potatoes

01Jan

This is such a simple side dish but it is our son Caleb’s favourite dish. He thinks it is the main dish and helps himself to half a tray and only dishes up a side of the main. Unless it’s steak he loves his steak even more.

What you need

  • Potatoes
  • Olive Oil
  • Spices of your choice
  • Salt

Taking whole potatoes and of course washing it off first before we cut it into half.

Before packing it into the foil pans/baking dish, we first coat the pan with a layer of olive oil and spice (depending on the mood – we have used almost everything under the sun).

Then Jacques very skillfully plays Tetris with the potatoes as to fit the most into one pan, cut side facing downward.

Then we brush the potatoes with more olive oil and spice it again.

How simple is that?

Put it uncovered into the oven for about an hour until it becomes nice and crisp on the bottom and top and then serve for the delight of everyone.

It is even nice when served cold the next day.

We have made this dish to accompany a braai, meat or fish grilled in the oven or even just as an easy lunch on its own for our kids.

Always a winner!

Potato Gratin

01Jan

This is also one of the recipes that I took from my mother’s house.  She makes it a bit different to us as we have made some adjustments to suit our own tastes.

In South Africa you can buy a “Potato Bake” mix which adds flavour to the potatoes.  Many times we are able to receive this from friends that visit us but when we run out we have to make a different plan.

This potato dish is one of Abigail’s favourite dishes and she is always so excited when we prepare it for shabbat.

What you need

  • Potatoes
  • Onions
  • Mushrooms (optional), we very rarely use mushrooms as Abigail prefers it without mushrooms
  • Salt or spice of your choice
  • Cream
  • Potato Bake or Creamy Mushroom Soup Powder
  • Shredded cheese for the top layer

What works best for us is if Jacques cuts the potatoes and onions and I pack the baking dishes.  He cuts the potatoes and onions in thin slices.  Jacques has such wonderful knife skills and has the ability to cut anything that it still looks good.

Pack a layer of potatoes at the bottom of your baking dish.  Sprinkle the spice of your choice on the potatoes, be careful not to use too much, just enough to make sure that your potatoes do not taste bland.

Next pack a layer of onions, it does not need to be a perfect layer, I just make sure that most of the potatoes are covered with a thin layer of the onions.  

If you are using mushrooms then this would be the time to make a thin layer of mushrooms.

After the first layers are packed, repeat the whole process again until you have reached the top of your baking dish.

I recommend that you stop about 1-2 cm before reaching the top of your baking dish otherwise you might find that you do not have enough space to pour over your cream and your shredded cheese

Mix your Potato Bake or Mushroom Soup powder with cream, making sure that the powder is mixed well with the cream.  Unfortunately like so many other occasions I cannot tell you exactly how much of what as I always guess, but for those of you who wish to mix it more accurately you can safely follow the instructions on the Potato Bake packaging or at least double the amount of soup powder that is suggested to making soup in ratio to the fluid.  

Once it is mixed pour it over all the potatoes making sure that you cover them well with the cream mixture.  Cover your baking dish with foil and then place it into a hot oven, 150-180°C, for about an hour to 90 minutes.  The time in the oven also depends on the thickness of your potatoes slices.  This is also why we recommend cutting them into thinner slices, this allows them to need less cooking time.

Once the potatoes are soft, stick a sharp knife into the middle of the dish to test, you can remove the foil.  At this point cover it with a nice amount of shredded cheese and then place it back into the oven.  If you are in a rush you can put your oven on grill which will allow your cheese to brown faster.  Most if the time we have something else in the oven as well and I prefer to give it a slower browning time. I keep the oven on its baking setting and with time the cheese browns.

When serving it is nice to add some green colour on top of the cheese.  We basically use any greens that we have in the fridge, from fresh parsley to spring onion, they all get the job done.

What is great about this recipe is, you bake a few dishes easily put one or two in the freezer and reheat it for another occasion.

Sweet Potato or Butternut Pie

01Jan

We found this recipe online a few years ago, unfortunately the link isn’t available anymore but this is more or less the recipe.

It is a Beit Chai favourite.  Although this is a side dish people often tell us that it could be a dessert.  We have yet to have a guest that did not fall in love with this dish.  

As per the name we have used both sweet potato or butternut to make this dish.  Unlike the South African sweet potato in Israel our sweet potatoes are orange.  We have never tried it with South African sweet potatoes. 

What you need for the Pie

  • 100g Butter
  • 170g Sugar
  • 3 Eggs
  • 120g Self raising flour
  • Salt
  • 5ml Vanilla essence
  • More or less 3 cups of butternut or sweet potato 

What you need for the sauce

  • 150g Butter
  • 100ml cream
  • 100g sugar

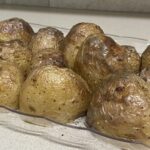
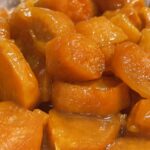
When preparing the butternut we find that it is better to wrap them in foil and roast it in the oven rather than to boil it in water. If you follow our foil method you need to allow at least an hour maybe more depending on the size for the butternut to become soft enough.  Once they are soft allow them to cool.  Remove the foil and then as easy as one, two, three you can remove the skin and seeds from the flesh of the butternut.  If you boil or steam it, you have to make sure that you drain all the water from the butternut before adding it to you batter.  

If you choose to use sweet potato, then boil or steam it. We cut it into pieces and put it in a strainer over a pot of boiling water.  This way we eliminate the danger of the sweet potato absorbing a whole lot of water.

Pre heat your oven to 180 degrees Celsius.

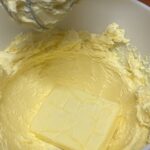
Cream the sugar and butter together until it is are nice and fluffy.

Add the eggs and continue to beat together. 

At this point I exchange my whipping head to a batter head.

Add the sifted flour and salt to the mixture and mix it together making sure the flour doesn’t cause any lumps to form in your batter.

Add the vanilla essence and pumpkin to the mixture and mix it one last time.

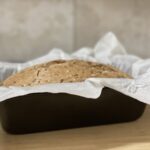
Oil your baking dish and pour your batter into the baking dish.

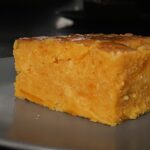
Bake in the oven for at least 45 minutes.

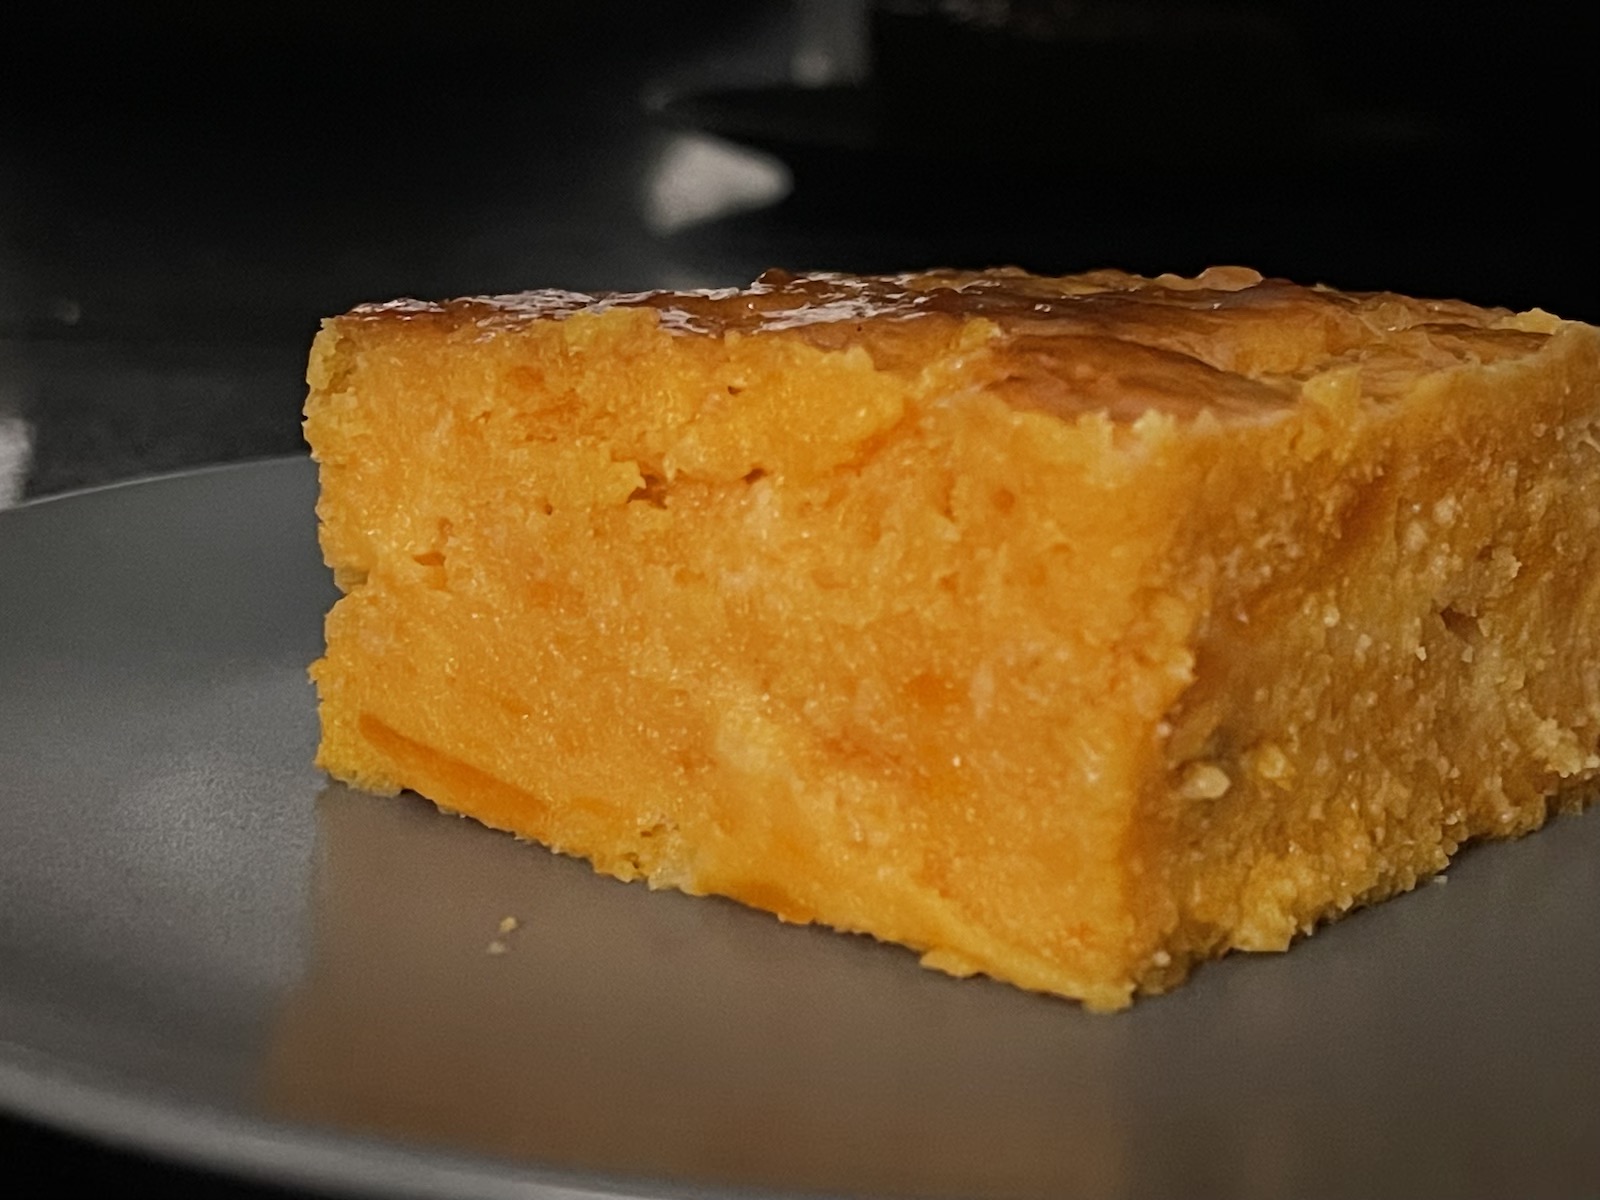
Due to the fact that we very seldom only make the batter once we find that we have to keep it in the over for a bit longer than 45 minutes, so my advice is that you will test your pie before removing it from the oven to make sure it is fully cooked. Once the pie has finished baking you will be adding a sauce over the pie, so over baking it doesn’t cause too much of a problem. The sauce is poured over while the pie is still hot, making sure that every part of the pie absorbs the sauce.

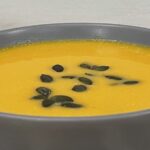
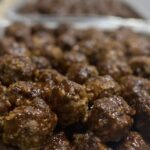
While the pies are in the oven we melt all the ingredients for the sauce in a pot on the stove and allow it to simmer and reduce a bit.  It is almost the same method as what you would follow when making a Malva Pudding (we will add a recipe soon).  The only difference is that we do not reduce the sauce as much as when we make a Malva pudding.  The reason for this is because the dough is a much denser dough and we find that if the sauce is too thick the pie doesn’t absorb the sauce enough.  

Here we have discovered some tricks to help with the process.

We make sure that the pie is loosened from the edges of your backing dish before the sauce is poured over.

Jacques invented a nice tool for us to poke some holes into the pie.  He took a wine cork and inserted 4 toothpicks into the side of it.  Holding onto the cork, he pokes the toothpicks into the pie until there are enough holes to allow for maximum absorption.  A fork can also be used but we found the it sometimes makes ugly holes.

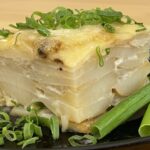
This pie is better served with a spoon to dish up with than trying to cut it into pieces.

This pie also does well in the freezer if you have left overs or extra pies that you want to use at a later date.

Meatballs

01Jan

Meatballs are one of our go to dishes when we know that we will receive guests in a time that we might not have enough time to create a full meal.

It is so easy to prepare beforehand and then store in the freezer for when we need it.

We used to be able to buy nice quality mincemeat in Israel at a reasonable price but those days have long since passed so we had to come up with an alternative.

When we shop we always look for cuts of meat that are good quality but at a reasonable price.  When we find those we purchase it and keep it in the freezer to use when we need it.

When we want to make meatballs we normally use these cuts of meat and grind them up ourselves.

What you need

  • Ground beef
  • Onion
  • Eggs
  • Quick fine Oats

Some spices that we like to mix with the meat

  • Cinnamon
  • Salt
  • Flippen lekker spice, Worcester sauce flavour (from South Africa)
  • Origanum
  • Sugar
  • Ina Parman’s meat spice (from South Africa)

What you need for the glaze

I will not give any exact amounts because I cannot – I never use any measuring system when making a dressing.

We like to make our own combination of glaze and it can include any or all of the following.  It depends on the flavour that you wish to have.

  • BBQ sauce
  • Chutney
  • Sweet Chilli
  • Tomato Sauce
  • Mustard

When we grind our meat we usually grind up the onion together with the meat to make sure that it is nicely combined. If you are using ground beef, you can add chopped onions to it.

With our meat ground we add our spices – now here is where it gets exciting – adding the spices

We find meatballs to be very forgiving when it comes to flavouring. We have literally tried almost any spice when making meatballs at is has never come short in taste

The important thing of course is to make sure that you have enough salt in the mixture.

Like I said basically anything works – it depends on the flavour that you are looking for.

Then we add some eggs and also oats to make sure the meat binds together when we make the balls – the oats also helps to absorb some of the moisture that cooks out of the meat.

Now all that is left is rolling the balls and packing them in the baking dish.

We like to weigh our balls on the scale to make sure each one is the same size.  We have found that 50 grams is a good size for us to fill up a foil pan nice and snugly. We put 24 meatballs neatly line up in 6 rows which is also a great size for our tables. Each person can then get at least 3 to 4 meatballs.

We normally bake the meatballs covered with foil in the oven for at least 30 minutes.  After 30 minutes we take them out and remove any extra meat protein and drain the extra meat juices from the baking dish.

We often take the meat juices from the meatballs and add it to our glaze to make it a bit easier to apply.

Then we coat the meatballs using a food brush – again so many different things work.

Once the meatballs are coated we put them back into the oven (uncovered) for a while so that the sauce can brown the meatballs.  

Now is when you want to make sure that you do not have them in the oven for two longs to prevent them from becoming dry.