Beef

Meatballs

01Jan

Meatballs are one of our go to dishes when we know that we will receive guests in a time that we might not have enough time to create a full meal.

It is so easy to prepare beforehand and then store in the freezer for when we need it.

We used to be able to buy nice quality mincemeat in Israel at a reasonable price but those days have long since passed so we had to come up with an alternative.

When we shop we always look for cuts of meat that are good quality but at a reasonable price.  When we find those we purchase it and keep it in the freezer to use when we need it.

When we want to make meatballs we normally use these cuts of meat and grind them up ourselves.

What you need

  • Ground beef
  • Onion
  • Eggs
  • Quick fine Oats

Some spices that we like to mix with the meat

  • Cinnamon
  • Salt
  • Flippen lekker spice, Worcester sauce flavour (from South Africa)
  • Origanum
  • Sugar
  • Ina Parman’s meat spice (from South Africa)

What you need for the glaze

I will not give any exact amounts because I cannot – I never use any measuring system when making a dressing.

We like to make our own combination of glaze and it can include any or all of the following.  It depends on the flavour that you wish to have.

  • BBQ sauce
  • Chutney
  • Sweet Chilli
  • Tomato Sauce
  • Mustard

When we grind our meat we usually grind up the onion together with the meat to make sure that it is nicely combined. If you are using ground beef, you can add chopped onions to it.

With our meat ground we add our spices – now here is where it gets exciting – adding the spices

We find meatballs to be very forgiving when it comes to flavouring. We have literally tried almost any spice when making meatballs at is has never come short in taste

The important thing of course is to make sure that you have enough salt in the mixture.

Like I said basically anything works – it depends on the flavour that you are looking for.

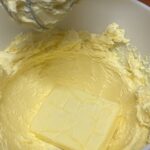
Then we add some eggs and also oats to make sure the meat binds together when we make the balls – the oats also helps to absorb some of the moisture that cooks out of the meat.

Now all that is left is rolling the balls and packing them in the baking dish.

We like to weigh our balls on the scale to make sure each one is the same size.  We have found that 50 grams is a good size for us to fill up a foil pan nice and snugly. We put 24 meatballs neatly line up in 6 rows which is also a great size for our tables. Each person can then get at least 3 to 4 meatballs.

We normally bake the meatballs covered with foil in the oven for at least 30 minutes.  After 30 minutes we take them out and remove any extra meat protein and drain the extra meat juices from the baking dish.

We often take the meat juices from the meatballs and add it to our glaze to make it a bit easier to apply.

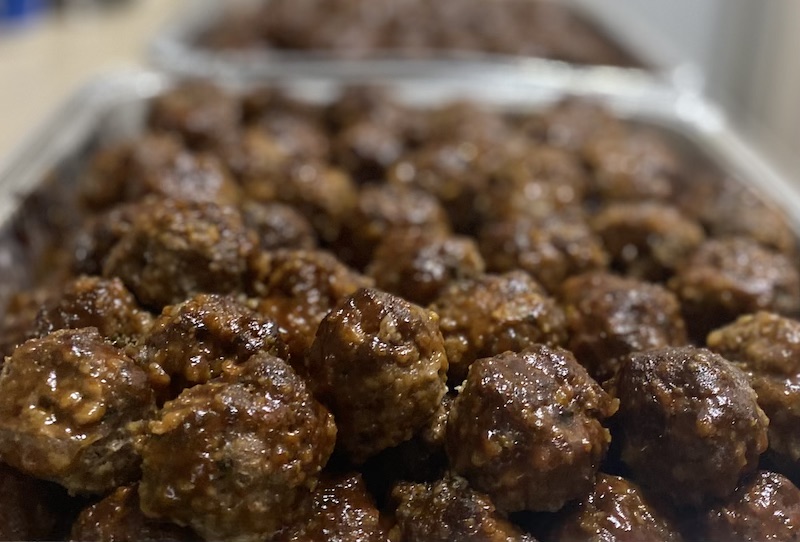
Then we coat the meatballs using a food brush – again so many different things work.

Once the meatballs are coated we put them back into the oven (uncovered) for a while so that the sauce can brown the meatballs.  

Now is when you want to make sure that you do not have them in the oven for two longs to prevent them from becoming dry.

Oven Slow Roast

01Jan

One of my favourite things to prepare is an oven slow roast.  What is nice about this meal is that you can prepare the meat in different variations depending on your own preference and mood.  I find that a piece of meat basically loves any kinds of spices.  I have done it all, tried it all and have never yet had a bad combination of spices.

I often think that all spices are best friends and they all have trained well to love each other and complement each other.  Either that or the Father is very good to me and has allowed me to not find any flavours that do not like one another.

In Israel high quality meat is very expensive so we often buy a more affordable cut and rather slow roast it in the oven.  It is amazing how tender and juicy the meat is after a few hours in the oven on a low heat.  

What you need

  • A cut of meat of your choice
  • Spices – I like to make a blend of spices in a small bowl and then mix them all together and rub it on my raw meat.

My favourites are 

  • Granulated Garlic
  • Meat Spices –  there are various blends available
  • Ground Coriander
  • Brown Sugar
  • Normal Salt
  • Mustard Powder

We like brisket but any boneless cut of beef should work.  Jacques normally takes the time to remove any sinew (also known as silver skin) from the meat.  In the past I was too impatient and just put the meat untreated in the oven and the sinew often caused my beautiful large piece of meat to pull together in a much smaller piece of meat.  I have since learned my lesson and allow the extra time to remove the sinew.

We place the meat in our baking dish and rub our mixture of spices onto the meat making sure it is covered all over.

In the past I used to add olive oil to my meat but I have found that there is enough fat in the meat and adding extra olive oil causes the juices in the baking dish to become a bit too oily.

Add some water to your roasting pan (not too much) I have found that adding a bit of moisture at the bottom of the meat helps that the roast doesn’t shrink while roasting. Roast at 125-150 degrees Celsius for a few hours. We do visit the meat in the oven during its baking time to turn it over and also make sure it still has enough moisture in the baking dish.

When the meat is cooked, allow it to rest for at least 10-20 minutes before cutting it into slices.  

Good additions to your roast can also be potatoes and onions. We normally add this into the baking dish an hour or so before the roast is done so that they can cook in the juices of the meat.

When serving it some fresh chopped parsley is a great garnish.

Braided Pies

01Jan

This is an absolute winner recipe.  It has never failed to impress our guests.  It has however caused us the occasional moment of stress if we didn’t put it in the oven early enough or if we made our filling a bit too moist and it started to cook out of the dough. 

This pie likes to rest a little bit after being baked before we cut it so we always take this into consideration when we calculate our cooking time to allow enough time in the oven, time to rest and time to cut before presenting it to the guests.

We have two different fillings that we use and we will give you the recipe for both on this page.

What you need for the Chicken filling

  • Chicken breast 
  • Salt & Spices (according to your own preference)
    Here are some suggestions that I like to use Ginger, Mustard, Chicken Spice, Garlic, Cloves – I love to use a combination of different spices to get a unique taste.
  • Mayonnaise 
  • Shredded Cheese

Some spices that we like to mix with the meat

  • We use a piece of brisket meat
  • Salt & Spices (according to your own preference)
    Here are some suggestions that I like to use Garlic, Coriander, Meat spice, Worcestershire sauce spice, Whole coriander seeds
  • Mayonnaise
  • Shredded Cheese 
  • Here I have to mention that it is very seldom that we will make a roast to use for a meat pie.  Normally we make a roast for a Shabbat meal and then whatever is left over we will turn into a meat pie.  If you wish to follow our roasting method then you are welcome to view our oven roast recipe on the side bar.

What you need for the pie

  • We use store bought puff pastry – Yes I know it would be great if we made our own dough but we have not yet tried our hand in this so let’s just stick to the store bought dough for now. As a side note we have sometimes before serving, sifted some powder sugar over the chicken pie.

Chicken Pie

Boil the chicken breasts in water together with your own unique mixture of spices.

Once the chicken is cooked remove it from the water.

Wait, wait, wait – before you just through the water down the drain.   Let it cool down and then pour it through a very small strainer into an empty, washed out milk carton.  Label it with a maker and store it in the freezer and then when you are ready to make our butternut soup (see recipe to the side) then you have your own chicken broth. The nice thing about the milk cartons is, you can tear the carton open when you are ready to use it and put the frozen block of stock directly into the pot.

While the chicken is still hot cut it into smaller pieces making sure that there are no bones or cartilage in the meat.  Take a double whisk mixer to shred the chicken.  This is a very nice easy way to get nice fine strands of chicken within no time.

When the chicken has cooled down mix it with some shredded cheese and mayonnaise.  The amount of cheese depends on your own preference, but not too much that it will cause the pie to leak oil while cooking. We use about a third of the weight of the chicken. I have also on occasion added sweet chilli sauce and mustard to the chicken for additional flavour.  

The end result of your filling should be that it can hold its form but not to wet that it will cause the pie to be a runny mess.

It is all about trial and error and having fun while learning 

Meat Pie

Like I mentioned before we very rarely roast a piece of meat for a pie it is normally when we have left overs that we use this meat to make a pie.

If you have a piece of meat which is just finished roasting you can cut it in smaller pieces and also use a double whisk mixer to shred it into smaller pieces.  If your meat is already cold then a mixer doesn’t work as effectively so you might need to cut it with a knife into small pieces. 

When your meat is nice and fine add your shredded cheese and mayonnaise and make sure it is mixed well.  We use less cheese and mayonnaise with the meat than with the chicken as meat tends to be a bit more oily than the chicken.  Again the idea is that the consistency of the meat would be to hold itself together when placing it onto the dough 

I am not even going to try to explain in words how to roll out the dough and the braiding process, for this we made a video.

I will however say this.  When rolling out your dough make sure of the following

– Your dough is nice and cold

– Your surface has enough (but not too much) flour on

– We only roll out the ends of the dough leaving the middle part a bit thicker to help the pie to keep its form.

Once the pie has been braided you have one of two options.  You can either place it in your pre heated oven at about 180 degrees Celsius for an hour, or you can place it in your freezer to use at a later date.  

If you choose the oven then first take some milk and brush the dough lightly with the milk to ensure a nice brown bake.  We also sometimes put sesame seed on top of the pie.  After about an hour your pie should be done.  Make sure that your dough is cooked through and nice and crunchy at the bottom.  Allow it to rest for a while before cutting it.  

If you choose the freezer then you can place it uncovered in the freezer until it has frozen enough to keep its form and then place it in a bag or wrap it with cling wrap to store for a later date.